In this final project, I do the front-end (and a little bit of back-end) using Visual Basic, which I made a form that allows the user to manipulate the tables of the database (in this case the administrator). Below is the screenshots of the script and the design of the form, following with the testing stage.
Form 1
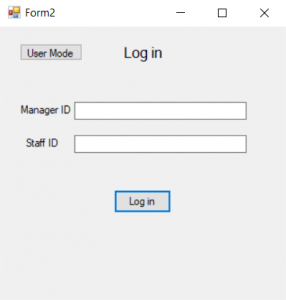
This form acts as the login form, which assumes that only the manager that is allowed to edit and have full access to the database. This form also allows the user to use the ‘User Mode’, a mode that shows the prototype of the application that is inspired from commercial taxi applications. In order for the user to be able to access the database section of the program, the user needs to know a manager ID and its staff ID, otherwise, it will display a message box that says that either both or one of them is wrong, similar to online social medias’ login page.
Form 2
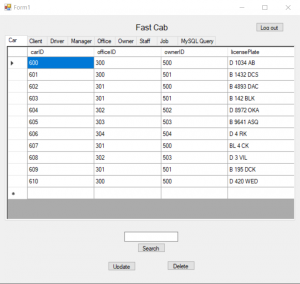
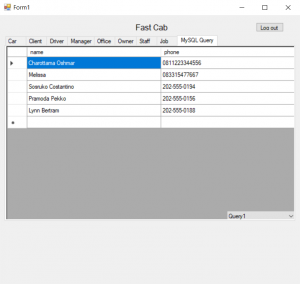
This form will only open if the user has successfully if the user knows the correct manager ID and staff ID. All of these database’s tables are stored in different datagridview objects. Datagridview object allows the user to edit directly on the object itself instead of using an external method and/or object to create any changes to the tables that is located in the database. There are several differences between the ‘MySQL Query’ tabs and the rest of the tabs as listed below:
- All tabs have the search bar, search button, update button, and delete button active, while the ‘MySQL Query’ does not.
- Only the ‘MySQL Query’ tab has the combo box to show the requested queries.
- Only the ‘MySQL Query’ tab’s content is uneditable, while other tabs allow the datagridview objects to be added, altered, and deleted, followed by clicking the ‘Update’ button to commit any changes to the datagridview object itself and the actual table in the database.
Form 3
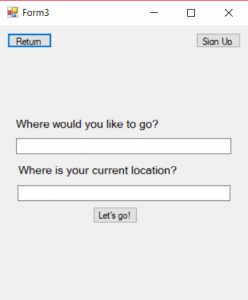

This form can be accessed from the ‘Form 1’ object without the need of inputting the correct both manager ID and staff ID. The forms act as a prototype and a simulation of product that allows the user to use the service. The first part requires the user to input their current or the desired position to be picked up by the driver and the destination the user is heading to. When the user is done inputting the necessary information, the user can click the ‘Let’s go’ button to call a driver. It will lead the user to the next event, where the form informs the user that the application has successfully called a driver and shows the simulated distance between the pickup location to the destination and the price. The progressbar object shows the estimated time for the driver to arrive at the pickup location.
As the user click the ‘Let’s go’ button, the transaction will be recorded into the Jobs table, which can be checked from the database form (Form 2) and also updates the number of how many times does the user has used the service into the Clients table, which can be also checked in the database form.
Form 4
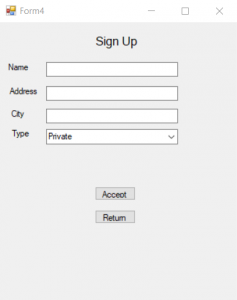
This form acts as a simulation for the user to sign up for the service. It basically allows the user to add themselves to the database by inputting the required information about the user, along with the type of service they need. If they clicked the ‘Accept’ button, the information will be added to the ‘Clients’ table. The ‘Return’ button will bring the user back to Form 3.
Form 3’s update
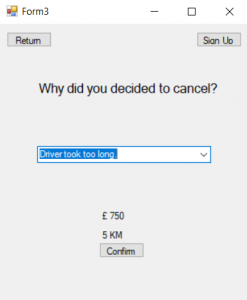
The new feature allow the user to cancel their trip at anytime, provided that the user has a reason for canceling the trip. As the user hit the ‘Confirm’ button, the reason will be recorded into the Jobs table, in the failReason column.
Project Name: Fastcab Database Manager
Project Member: Vincent, Archel, Charotama
Course: COMP6339 – Database Systems
